Chrome Nails are a type of nail design or polish which gives the nails a more reflective, mirrored, and metallic finish. They also have a very uniform gleam which sparkles a whole lot after the nails are polished.
In this article, I will be discussing how you can achieve the look of chrome nails. Keep reading till the end of the article to find out more information about the same!
Popular Chrome Nail Designs To Try Out
Here is a list of some of the more creative designs for Chrome nails for you to try out:
1. Baby Blue
This is a very pretty look for nails and serves as the perfect look for Winter. The icy baby blue color from Aprés Nail gel gives off a very elegant vibe. The chrome pigment applied atop those painted baby blue nails are only going to be the cherry on cake for such a nail look.
2. Glazed Donut Nails
This is more of a classic chrome nail look if you are all for minimalistic nail art/designs. To get this look you can use a coat of soft white nail polish and pale pink each to get the glazed look. To end it off apply a layer of chrome pigment to finish the look.
To make this look a bit more dramatic, you can apply a coat of glitter clear polish as well!
3. Color Blocking Chrome Nails
Rather than applying a layer of chrome pigment over the whole of your nails, you can use the color blocking design method on nails to create a funky look. When doing this design make sure to choose only lighter colors as the chrome pigment looks the best on lighter colored nails.
When applying the chrome pigment on your nails for this look, make sure to put it on selective areas only and not over the whole of your nails.
For the color blocking colors you could do a classic white chrome nails and black chrome nails look.
4. Cotton Candy Chrome
For this look, apply different unique pastel shades for each of your fingernails. Go for shades like – pink, white, blue, soft green, and lavender. Apply the chrome pigment on all of the nail shades.
To take the cuteness up a notch, you could apply chunky glitter on one of the nails to highlight and contrast it from the rest of the sparkly nails.
5. Golden Tips
To get this look, first, you need to paint the base with a color that is close to your natural nail color. Then paint the end (only the extreme edge of your nail tips) with a metallic golden color to finish the look.
When painting the tips you need to be extremely precise (and make sure that the tips are painted as thin as possible).
6. Cool Pale Pink Look
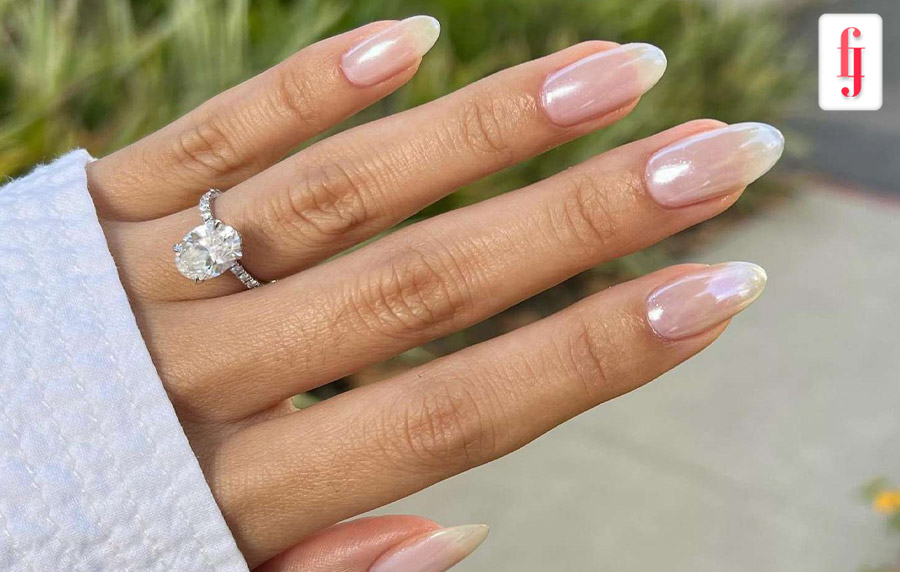
This is the most natural take on the chrome nails trend. To do this look first you need to have freshly manicured gel nails. Then apply chrome powder on a clear base. After that, atop the nails, paint a single coat of pale pink nail polish – to make the look appear more stunning on you. Pink chrome nails look absolutely great on any skin tone as well!
This design also resembles a lot to Hailey Bieber chrome nails look.
7. Barbie Chrome
This is the perfect Barbiecore look for you. For this look, you need to apply hot pink nail polish and then top it off with chrome pigment. This is a very dramatic look, hence, if you are a fan of more subtle nail looks then do not opt for it.
8. Pastel Rainbow Chrome
This look is somewhat similar to the cotton candy chrome look that I briefly mentioned a few points earlier. To get this look, you need to paint each nail a different color. Then apply a coating of chrome pigment to finish off the look.
How To DIY Chrome Nails
You do not have to visit a costly salon to get Chrome nails done, they can be DIY-ed from the comfort of your home as well. Prior to getting started with the steps that I will be discussing below, you need to get a hold of these materials first – base coat polish, buffer, gel nail polish, top layer, UV or LED lamp, and chrome pigment.
- Step 1
First and foremost, you are going to have to buff your nails to prep them up for the procedure ahead. After you are done with buffing then, you can brush off the nail dust.
- Step 2
Then apply primer on your nails as a base before putting gel nail polish in the next step. After you are done applying primer, put a very thin layer of coating gel polish on your nails.
- Step 3
After you are done with the earlier steps, place your hands under a UV/LED lamp — for allowing the polish to set.
- Step 4
Now finally, you can apply the chrome pigment across each of your nails. Keep applying it till the nails begin to appear as a reflective surface.
- Step 5
Finally, apply a very thin layer of topcoat and then dry it in an LED/UV lamp. If any sticky residue is left on top of the nails after this process then make use of an isopropyl alcohol to remove the blur.
And that was all for information regarding how to do chrome nails at home. If you are having problems with doing this at home then there are a lot of nail tutorial videos available on Youtube as well – which you can get help from.
To Wrap It Up!
If you have never done your nails before, then this look is the best to get started with. Being an absolute beginner in this would not help the look if you try to get it done by yourself — hence, it is recommended you opt for a nail salon that is located nearby you.
Thank you for reading this article up till here. I hope you found the information regarding “chrome nails” useful.
Also Read:
- Lake Pajamas Review: Dive Into Comfort
- Check Out Some Of The Famous Tory Burch Sunglasses
- Have You Tried On These Famous Frances Valentine Dresses?